Translations:Wiren Board 4:Первое включение/3/en: различия между версиями
(Новая страница: «500px|thumb|right|Wiren Board 4 #Check the microSD card. #:The memory card with the software image is supplied in the kit and is usually al…») |
(нет различий)
|
Текущая версия на 14:37, 7 июня 2019
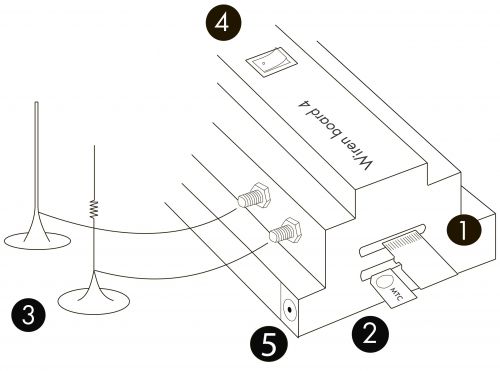
- Check the microSD card.
- The memory card with the software image is supplied in the kit and is usually already inserted ( into the top connector contacts inward upwards). If you don't have a microSD card, follow the instructions.
- Установите microSIM (optional).
- microSIM-карта is inserted into the lower connector with the contacts facing downwards at a cut-off angle.
- Connect external antennas.
- Screw the GSM and 433MHz antennas (optional) to the SMA connectors.
- Turn off the button on the front panel.
- Connect the power supply.
- Plug the power supply into the connector. If you are using a DIN rail or other power supply without a connector, simply clamp the wires into the Vin and Gnd terminals. It is also possible to power Passive Power over Ethernet.
