WBC-4G v.2/en: различия между версиями
Метки: правка с мобильного устройства правка из мобильной версии |
|||
| Строка 11: | Строка 11: | ||
{{Wbincludes:WBC-4G Спецификации}} | {{Wbincludes:WBC-4G Спецификации}} | ||
== Module | == Module Installation == | ||
[[File:WB7+Modem.png|300px|thumb|right| | [[File:WB7+Modem.png|300px|thumb|right|WBC-4G v.2 module installation into Wiren Board 7 controller]] | ||
{{Wbincludes:Setup MOD}} | {{Wbincludes:Setup MOD}} | ||
#Insert the SIM card | #Insert the SIM card | ||
# | #Assemble the case back together. | ||
#Screw the external antenna onto SMA | #Screw the external antenna onto the SMA connector. | ||
When | When installing in a metallic shield for reliable radio communication, place the antenna outside. | ||
== Configuration == | == Configuration == | ||
Версия 11:26, 31 мая 2023

Description
WBC-4G v.2 is suitable for Wiren Board 6.7-6.9 and 7.x, the difference from v.1 is an increased cutout at the bottom.
Wbincludes:WBC-4G Спецификации
Module Installation

When ordering modules bundled with the Wiren Board controller, we install them in production - you only need to configure the modules in web interface of the controller.
If you bought the modules separately, install them yourself:
- Disassemble the controller case.
- Insert the module, observing the polarity: the protrusion on it must fit into the groove on the controller board.
- Insert the SIM card
- Assemble the case back together.
- Screw the external antenna onto the SMA connector.
When installing in a metallic shield for reliable radio communication, place the antenna outside.
Configuration
After physically connecting the modem, it should be added to the controller configuration:
- In the web interface, go to the Settings → Configs → Hardware Modules Configuration section, select the Modem slot.
- In the Module type drop-down list, select the type of the installed module.
- Click the Save button. The controller will enable the ports required for the modem to work.
To remove the module, select the type None.
After configuring, turn on the modem using the command wb-gsm on and set up the connection to the mobile operator.
Info
Обмен данными с модулем идет через последовательные порты /dev/ttyGSM и /dev/ttyUSBx (обычно это /dev/ttyUSB0 и /dev/ttyUSB1).
| Value | Parameter | Description |
|---|---|---|
| Auto-bauding | Baud rate | Speed, bit/s. Set to 115200 in the connection program settings.
After connecting, send |
| 8 | Data bits | Number of data bits |
| None | Parity | Parity bit |
| 1 | Stop bits | Number of stop bits |
| Off | Hardware flow control | Hardware flow control |
| Off | Software flow control | Software flow control |
При необходимости параметры соединения можно изменить через AT команды.
Setting up an internet connection
See the instructions for setting up internet via a 4G modem in the article GSM/GPRS. Please note that the 4G network does not operate in all regions. To check the current settings, use AT+CNMP?.
Switching the modem to the automatic network type selection mode is carried out by the command: AT+CNMP=2
Documentation
AT commands:
- Файл:A7600 Series AT Command Manual V1.02.pdf for pre-B05 chips;
- Файл:A76XX Series AT Command Manual V1.07.pdf for versions B05 and newer.
You can find out the chip version number with the AT command at+cgmr , which returns a string with the number, characters 6 to 8 will be the chip version. How to send an AT command.
For example, in the example below, the chip version is B05:
at+cgmr
+CGMR: A39C4B05A7600M7
Instructions for flashing modems SIMCom A76xxE-H
Known Issues
No known issues.
Device revisions
The batch number can be found on a sticker on the side of the case or on the PCB.
Images and drawings of the device
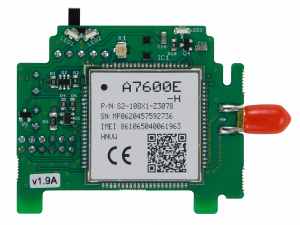
Front side of the WBC-4G v.2 module for WB6 and WB7
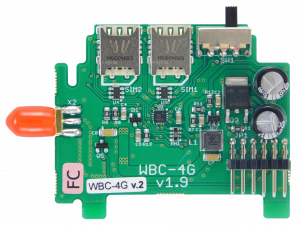
The reverse side of the WBC-4G v.2 module for WB6 and WB7

| Revision | Batch | Release date | Differences from previous revision |
|---|---|---|---|
| 2.1 | v2.1A/1, v2.1A, v2.1B, v2.1D/1, v2.1D/2, v2.1G, v2.1G/1 - ... | 11.2022 - ... |
|
| 1.10 | v1.10A, v1.10B, v1.10C, v1.10C/2 | 04.2022 - 12.2022 |
|
| 1.9 | v1.9A, v1.9B, v1.9B/2 | 12.2021 - 06.2022 |
|