Web Interface of Wiren Board Controllers
General information
Шаблон:Anchors Wiren Board controllers have a built-in web interface that allows you to perform most of the tasks for configuring the controller, firmware and connected devices. The source code is open and available in our repository.
nginx works as a web server, the site interacts with MQTT via WebSocket.
How to enter the web interface
To access the Web Interface of a Wiren Board controller, connect to the controller via Wi-Fi or Ethernet and enter IP address of the controller into the browser's address bar.
If you are on the same network as the controller and use Apple devices, a computer with Linux or Windows 10 and higher, then you can use mDNS instead of an IP address: enter http://wirenboard-XXXXXXXX.local into the address bar, where ХХХХХХХХ — eight-digit serial number of the controller.
Также доступ можно получить через Wiren Board Cloud, если контроллер к нему подключен.
СChange access level

To change the settings of the controller, you need the Administrator access level, which can be set in the Settings → Permissions section.
After completing the settings, we recommend that you set the access level to User or Operator - this will help you avoid making random mistakes when working with the web interface every day.
MQTT connection setup and language selection

In the Settings → Web UI section, you can configure the connection to the MQTT broker, select a panel for the home page and change the language of the web interface.
The web interface does not support user authorization, but you can configure nginx server http authorization. For detailed instructions, see Protecting the web interface of the controller with a password.
List of devices
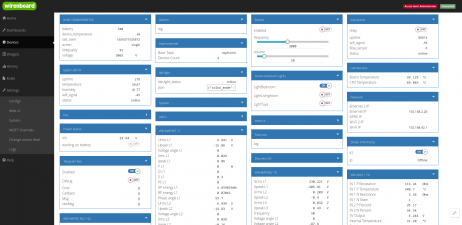
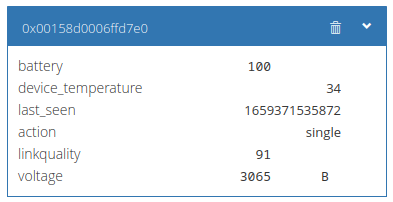
Шаблон:Anchors The Devices page contains virtual representations of devices physically connected to the controller or virtual devices created by wb-rules scripts.
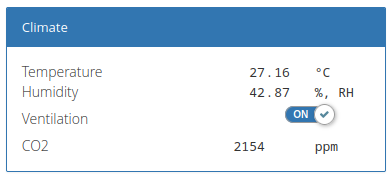
Each device is represented by a card that contains device channels - controls. If you click on the name of the control, you will get a path like device/control, which can be used when writing scripts on wb-rules.
Do not use this page to manage your automation system, there are dashboards for that.
List of devices connected to the controller
Removing a device card


Dashboards and widgets
Panels
Шаблон:Anchors You can create text and graphic SVG dashboards to display data and control your automation system.
The text dashboard consists of widgets, and the graphic dashboard consists of a background image with bindings to the MQTT channels of the controller.
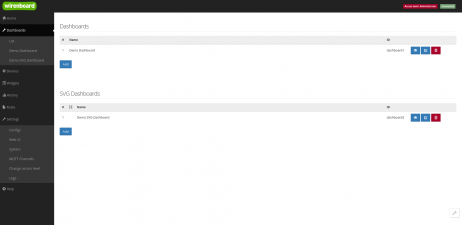
Dashboards List
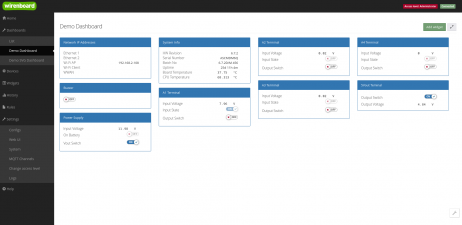
Text dashboard
- SVG Dashboard Example.png
SVG dashboard


Widgets
Шаблон:Anchors With the help of widgets, it is convenient to combine controls of different devices by meaning or location. For example, you can make a widget to control the lighting in a bedroom, or a climate widget in a store. Widgets are grouped into dashboards, one widget can be added to several dashboards.
You can create widgets in the Widgets section, or directly from the dashboard. There is a visual designer and a JSON editor.
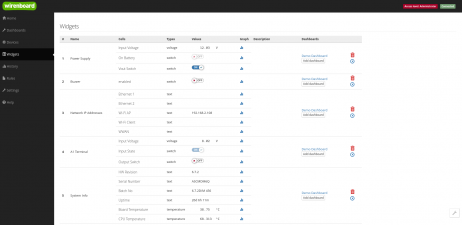
Widget List
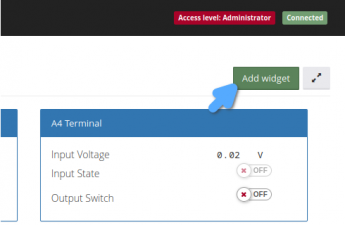
Creating a new widget from a dashboard
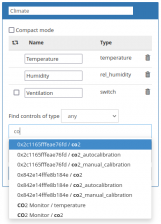
Widget constructor
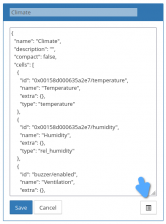
JSON view
Ready widget
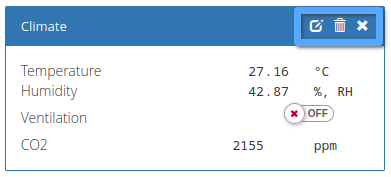
Edit buttons


History

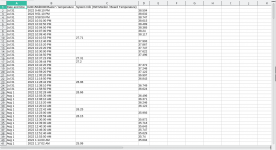
By default, the standard controller software stores all received data, which you can view in the form of graphs or tables. The data can be uploaded to csv, to do this, click on the button below the graph, or use the wb-mqtt-db-cli utility.
To view the history, go to the History section and select the desired channels, or hover over the widget's channel and click the histogram button.
Display options:
- choice of period;
- simultaneous viewing of several channels;
- scaling;
- taking a screenshot;
- cursor measurements.
Если вам надо больше возможностей, вы можете настроить автоматический экспорт данных в Grafana.
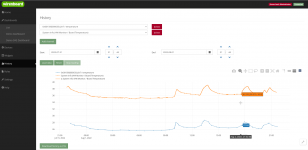
График
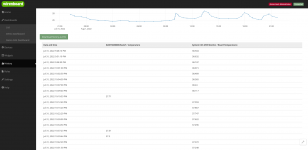
Табличное представление
Данные, выгруженные в CSV
Настройка хранения истории


Скрипты автоматизации
В веб-интерфейсе контроллера есть редактор скриптов wb-rules, который позволяет создавать, редактировать и удалять правила. Если в скрипте есть ошибки, то редактор сообщит вам об этом и укажет место в скрипте.
Редактор доступен в разделе Правила.
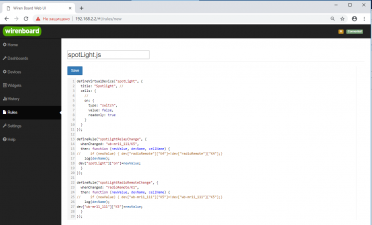
Редактор скриптов
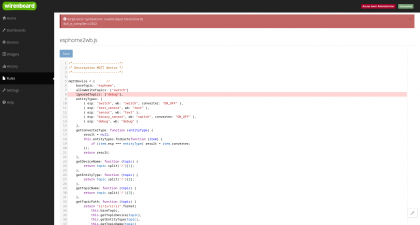
Подсветка ошибок


Настройка контроллера и подключённых устройств

Контроллер Wiren Board работает на Linux, поэтому почти все настройки хранятся в конфигурационных файлах. Файлы можно редактировать через SSH или с помощью веб-конфигуратора.
Список доступных настроек вы найдёте в разделе Настройки → Конфигурационные файлы.
Например, через веб-интерфейс можно настроить подключённые Modbus-устройства, шлюзы KNX и Modbus RTU/TCP Slave и другие параметры.
Уведомления о событиях
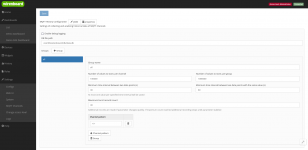
В веб-интерфейсе контроллера можно настроить отправку уведомления о событиях по SMS или Email, например, при срабатывании тревоги в модуле WB-MWAC, отправить SMS на заданный номер. Настройка модуля уведомлений.
Также вы можете отправлять уведомления в Телеграм, для этого нужно написать небольшой скрипт на wb-rules, пример.
Обновление прошивки и выгрузка диагностического архива

Обновить ПО контроллера без доступа к интернету можно через веб-интерфейс, для этого вам понадобится компьютер и заранее загруженный fit-файл прошивки. Подробнее про обновление ПО контроллера читайте в инструкции.
Если в работе контроллера возникли ошибки, то при обращении в техническую поддержку рекомендуем выгрузить диагностический архив — это поможет нам быстрее разобраться в проблеме. Если по какой-то причине выгрузить архив из веб-интерфейса не получается, воспользуйтесь консольной утилитой wb-diag-collect.
Просмотр MQTT-каналов и системного журнала
Список MQTT-каналов пригодится при диагностике неисправностей, или при настройке интеграции со сторонним ПО, например, Rapid SCADA или Home Assistant. Список доступен в разделе Настройки → MQTT-каналы.
Системный журнал ОС Linux можно посмотреть с помощью утилиты journalctl или в веб-интерфейсе контроллера в разделе Настройки → Системный журнал.
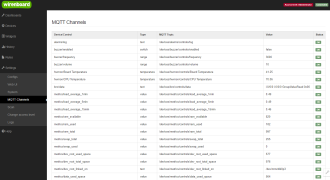
MQTT-каналы
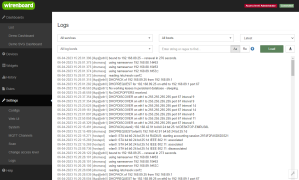
Системный журнал


Предыдущая версия
- Веб-интерфейс Wiren Board 1.0, заменён на 2.0 в начале 2021 года.