Первое включение Wiren Board/en: различия между версиями
(Новая страница: «Insert into the connector (on the side of the OLinuXino-MICRO Board).») |
(Новая страница: «=== Power Supply ===») |
||
| Строка 19: | Строка 19: | ||
Insert into the connector (on the side of the OLinuXino-MICRO Board). | Insert into the connector (on the side of the OLinuXino-MICRO Board). | ||
=== | === Power Supply === | ||
Подключите внешний блок питания в power jack. | Подключите внешний блок питания в power jack. | ||
Версия 13:59, 19 июля 2019
Antenna connection
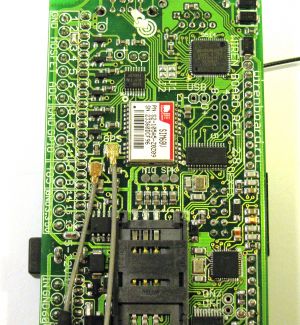
Connector u.fl for WiFi is inside the Wiren Board.
For connecting the antenna you need to remove the red charge, and a light press until it clicks to put the corresponding connector (it is convenient to do that with a pencil).
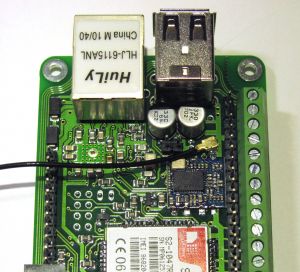
Antennas for GPS and GSM are connected from the outside of the board.
Do not place the GSM antenna near the processor. Aiming at the quartz of the processor causes it to reboot. Turn the antenna away from the USB and Ethernet connectors (as on the photo).
Flash card
Create a microSD card with the image.
Insert into the connector (on the side of the OLinuXino-MICRO Board).
Power Supply
Подключите внешний блок питания в power jack. Или подайте питание на клеммники 17 (Vin) и 18 (GND). Допустимый диапазон напряжений - 5-22 В.
Debug UART
Про Debug UART прочитайте здесь .
Если у вас Windows, скачайте Putty и запустите ее.
В настройках укажите тип соединения - serial, скорость - 115200, линия - COM3 (обычно это COM3, иначе смотрите в диспетчере устройств список портов).
Подключите переходник USB-UART. Откройте сессию.
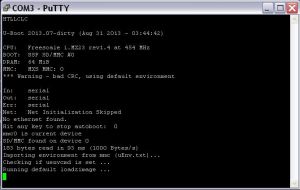
Теперь при включении WirenBoard должна сразу выводиться консоль линукса при загрузке.
Если этого не произошло, возможно вы перепутали Rx и Tx. Или по другой причине.


