IO modules/en: различия между версиями
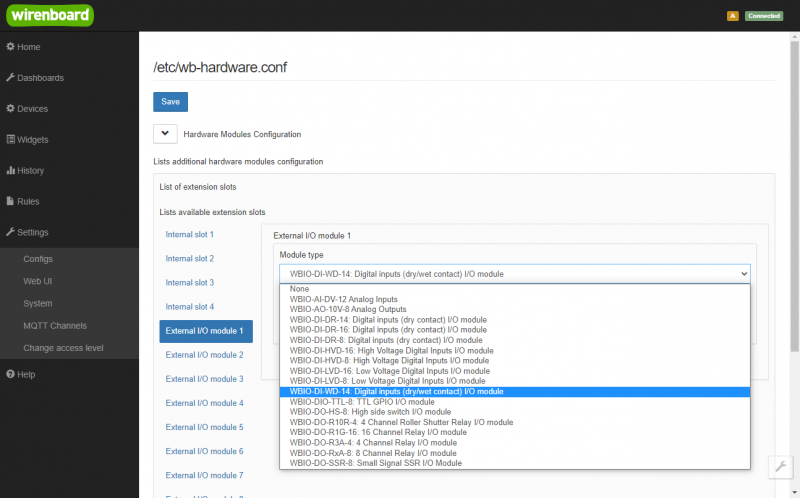
(Новая страница: «== Activating the modules in the controller web interface == 800px|thumb|center|Activating the new module») |
(Новая страница: «To activate a new module connected to the controller, go to the '''Hardware Modules Configuration''' section. Select the module position in the''' List of extensi…») |
||
| Строка 131: | Строка 131: | ||
[[Файл:Adding_External_Modules.png|800px|thumb|center|Activating the new module]] | [[Файл:Adding_External_Modules.png|800px|thumb|center|Activating the new module]] | ||
To activate a new module connected to the controller, go to the '''Hardware Modules Configuration''' section. Select the module position in the''' List of extension slots'''(for example, the first position: '''External I/O module 1'''). Select the type in the '''Module type''' list. | |||
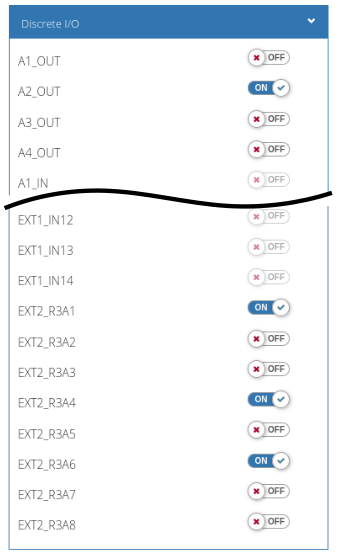
Нажмите кнопку Save вверху страницы и убедитесь, что внешний модуль виден в веб-интерфейсе: | Нажмите кнопку Save вверху страницы и убедитесь, что внешний модуль виден в веб-интерфейсе: | ||
Версия 14:31, 5 июня 2019
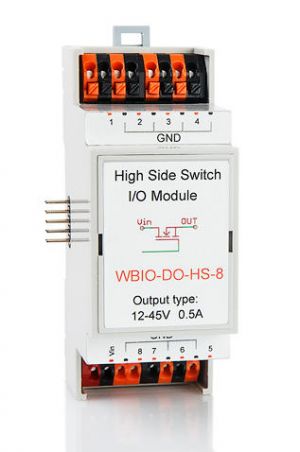
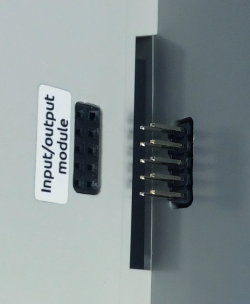
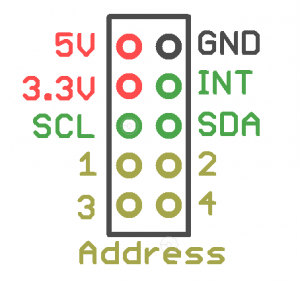
Input and output modules are stacked together with the Wiren Board controller through the connector on the right side of the enclosure.
You can connect up to 8 modules: Up to 4 input modules (type I), and up to 4 output module (Type O and IO). Exception: only one WBIO-AI-DV-12 module can be connected. The module type determines the module address on the side connector bus of the controller.
Addresses are distributed in the order of connection. Up to 4 modules can be connected in any order. With a larger number, you should daisy-chain connect modules of one type first, then of another type.
Communication Interface - I2C.
| Артикул | Описание | Количество
каналов |
Тип каналов | Ширина, DIN юнитов | Тип |
|---|---|---|---|---|---|
| Модули входов | |||||
| WBIO-DI-DR-8 | Модуль дискретных входов типа "сухой контакт" | 8 | входы "сухой контакт" | 2U | I |
| WBIO-DI-DR-16 | Модуль дискретных входов типа "сухой контакт" | 16 | входы "сухой контакт" | 3U | I |
| WBIO-DI-DR-14 | Модуль дискретных входов типа "сухой контакт" | 14 | входы "сухой контакт" | 2U | I |
| WBIO-DI-WD-14 | Универсальный модуль дискретных входов | 14 | входы "сухой контакт"
наличия напряжения 12/24В |
2U | I |
| WBIO-DI-HVD-8 | Модуль-детектор наличия сетевого напряжения (230В) | 8 | входы напряжения 50-250В AC | 2U | I |
| WBIO-DI-HVD-16 | Модуль-детектор наличия сетевого напряжения (230В) | 16 | входы напряжения 50-250В AC | 3U | I |
| WBIO-DI-LVD-8 | Модуль-детектор наличия напряжения 12/24В | 8 | входы напряжения 9-50В AC/DC | 2U | I |
| WBIO-DI-LVD-16 | Модуль-детектор наличия напряжения 12/24В | 16 | входы напряжения 9-50В AC/DC | 3U | I |
| WBIO-AI-DV-12 | Модуль аналоговых входов | 12 (6 дифф.) | аналоговые входы 0-3V,-50..+50V | 3U | I |
| WBIO-AI-DV-12/4-20MA | Модуль аналоговых входов 4-20мА | 12 | аналоговые входы 4-20мА | 3U | I |
| Модули выходов | |||||
| WBIO-DO-R3A-8 | Модуль релейных выходов 3A | 8 | механические реле, SPST и SPDT | 3U | O |
| WBIO-DO-R10A-8 | Модуль релейных выходов 10A | 8 | механические реле, SPST | 3U | O |
| WBIO-DO-R10R-4 | Модуль релейных выходов 10A
Main article: WBMZ-DIO-TTL-16. Activating the modules in the controller web interfaceTo activate a new module connected to the controller, go to the Hardware Modules Configuration section. Select the module position in the List of extension slots(for example, the first position: External I/O module 1). Select the type in the Module type list. Нажмите кнопку Save вверху страницы и убедитесь, что внешний модуль виден в веб-интерфейсе: MQTT-топики нового модуля: /devices/wb-gpio/controls/EXT1_K1 — /devices/wb-gpio/controls/EXT1_K8 |
||||
