RS-485: Wiring and Connection/en: различия между версиями
(Новая страница: «== Connecting devices ==») |
(Новая страница: «{|align="right" |-valign="top" |thumb|150px|Tips for RS-485 bus |Файл:M1W2PODKL2.png|thumb|150px|Connecting the RS-485 bus to th…») |
||
| Строка 93: | Строка 93: | ||
{|align="right" | {|align="right" | ||
|-valign="top" | |-valign="top" | ||
|[[Файл:M1W2PODKL.png|thumb|150px| | |[[Файл:M1W2PODKL.png|thumb|150px|Tips for RS-485 bus]] | ||
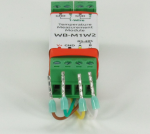
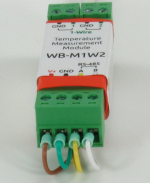
|[[Файл:M1W2PODKL2.png|thumb|150px| | |[[Файл:M1W2PODKL2.png|thumb|150px|Connecting the RS-485 bus to the WB-M1W2 bus coupler]] | ||
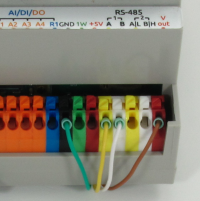
|[[Файл:WBPODKL.png|thumb|200px| | |[[Файл:WBPODKL.png|thumb|200px|Connecting the RS-485 to Wiren Board 5]] | ||
|} | |} | ||
Since all devices are connected by a common bus, make sure the quality of the connection of all nodes of the line: | |||
* | *when the line is broken, the devices behind the break will not operate | ||
* | *when the line is broken, the devices behind the break will not operate | ||
Рекомендуем использовать [http://www.chipdip.ru/catalog-show/tips/ штыревые наконечники под обжимку (НШВИ)]. Это позволяет легко подключать-отключать устройства без потери работоспособности остальных устройств на шине. При использовании при монтаже наконечников типа НШВИ необходимо, чтобы диаметр изолированных манжет не превышал габаритов клеммников устройств. | Рекомендуем использовать [http://www.chipdip.ru/catalog-show/tips/ штыревые наконечники под обжимку (НШВИ)]. Это позволяет легко подключать-отключать устройства без потери работоспособности остальных устройств на шине. При использовании при монтаже наконечников типа НШВИ необходимо, чтобы диаметр изолированных манжет не превышал габаритов клеммников устройств. | ||
Версия 19:04, 29 мая 2019
For General information on connecting RS-485 devices to the controller, see page RS-485.
Busbar laying
All RS-485 devices are installed on the same bus. The bus uses two data lines (A and B), and it is also often convenient to lay two power lines - GND and +12V (or other supply voltage).
Wire A is connected to terminal a on all devices, wire B is always connected to B.
It is necessary to use a pair twist cable: the RS-485 data (lines A and B) must form a twisted pair. If the same cable is used to power the devices, it is necessary to pay attention to the cross section of the conductors: a voltage drop on a long line can lead to the fact that the devices will not work. Finally, you should choose a shielded cable.
When installing, it is convenient to use a cable with flexible conductors. Examples are given below:
| Name | Flexible | Section of the conductor | Twisted pair | Screen | Approximate price, $/m |
|---|---|---|---|---|---|
| XPMG 2x2x0.35 | yes | 0.35 | yes | aluminium polyethylene tape | 0.4 |
| LiYCY TP 2х2х0,50 | yes | 0.5 | yes | braid | 1 |
| LiYCY TP 2х2х0,35 | yes | 0.35 | yes | braid | 0.8 |
| KIS-V 2х2х0,60 | yes | 0.6 | yes | braid | 1.1 |
Also, for bus laying, you can use a conventional twisted pair CAT5 for Ethernet - for it below is a standard wiring diagram (the usual wave resistance of such cable is 100 Ohms).
{{#invoke:Template translation|renderTranslatedTemplate|template=Template:Warning|noshift=1}}
{{#invoke:Template translation|renderTranslatedTemplate|template=Template:Warning|noshift=1}} The common wire terminal is designated, according to the equipment, as SC, SG, G, GND, ground or reference. On the Wiren Board controllers, this terminal is designated as GND. When connecting to an isolated port, you need to connect to the isolated ground of the port ("GND iso"terminals).
If your bus is longer than 100 meters, it is desirable to install a terminal resistor at its end (about 150 Ohms, see more in Wikipedia). For long lines, there are also recommendations to terminate unused cable conductors at both ends.
Connecting devices
Since all devices are connected by a common bus, make sure the quality of the connection of all nodes of the line:
- when the line is broken, the devices behind the break will not operate
- when the line is broken, the devices behind the break will not operate
Рекомендуем использовать штыревые наконечники под обжимку (НШВИ). Это позволяет легко подключать-отключать устройства без потери работоспособности остальных устройств на шине. При использовании при монтаже наконечников типа НШВИ необходимо, чтобы диаметр изолированных манжет не превышал габаритов клеммников устройств.
Провод A на всех устройствах подключается к клеммнику с маркировкой А, провод B - всегда к B. На Wiren Board рядом с клеммниками А и В расположены клеммники GND и Vout - можно сразу подключить линии питания (сначала проверьте требования к питанию ваших устройств!).
Лайфхак: так как внутри Wiren Board стоит растяжка линий, после подключения его к шине напряжение на линии A будет больше чем на B примерно на 0.5 В. Поэтому подключая периферийные устройства вы легко можете определить линии шины вольтметром. Но, конечно, цветовое кодирование проводников более предпочтительно.
Дополнительная информация
- Дифференциальная линия дает хорошую помехозащищенность. Длина линии до 1200 метров.
- При прокладке шины нужно соблюдать определённые правила, но для передачи в одной квартире подойдёт любой кабель и даже возможны ответвления.


