Translations:WBE2R-R-LORA v.1 Extension Module/4/en
Installation
The module is compatible with controllers Wiren Board 6, Wiren Board 7 and Wiren Board 8 of all revisions, it can be installed:
- Wiren Board 6.3–6.6 — up to 2 modules in slots MOD1-MOD2.
- Wiren Board 6.7–7.x — up to 3 modules in slots MOD1-MOD3.
- Wiren Board 8.4 — up to 3 modules in slots MOD1 -MOD3.
When ordering modules bundled with the Wiren Board controller, we install them in production - you only need to configure the modules in web interface of the controller.
If you bought the modules separately, install them yourself:
- Disassemble the controller case.
- Insert the module, observing the polarity: the protrusion on it must fit into the groove on the controller board.
- Fasten the SMA socket connector with nuts in the case hole above the Ethernet connectors (available in Wiren Board versions 6.5 and older, in earlier versions, drill yourself with a diameter of 6.5 mm).
- Reassemble the body. Keep an eye on the connecting cable from the module to the SMA socket: it must not be pinched, strongly bent, or get between the indicator and the light guide on the top cover.
- Screw the external antenna onto the SMA socket.
- When mounting in a metal shield, position the antenna outside for reliable radio communication.
- Mounting extension module
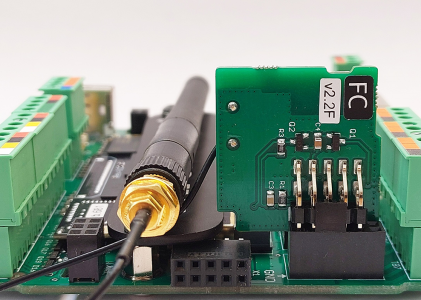
Inserting a module into a slot
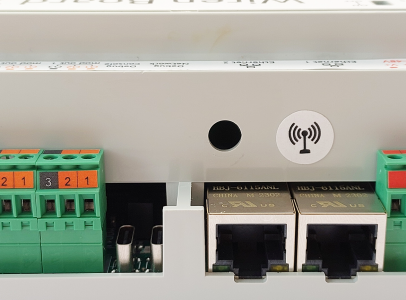
Have a snack with wire cutters or break off the plug with a screwdriver
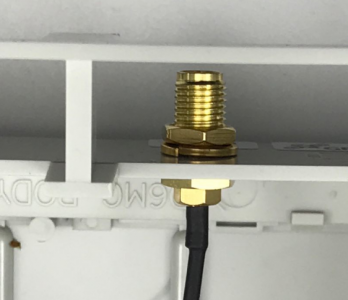
Mounting the SMA Antenna Jack


Configuration
Change access level

To change the settings of the controller, you need the Administrator access level, which can be set in the Settings → Permissions section.
After completing the settings, we recommend that you set the access level to User or Operator - this will help you avoid making random mistakes when working with the web interface every day.
Settings

After the module is physically connected, it must be added to the controller configuration:
- In the web interface, go to the section Settings → Configs → Hardware Modules Configuration, select the Internal slot where the module is installed extensions.
- In the Module type drop-down list, select the name of the installed module.
- Press the Save button. The controller will enable the ports required for the module to work.
To remove a module, select the type None.