Z-Wave
To use Z-Wave devices with a Wiren Board controller, you will need:
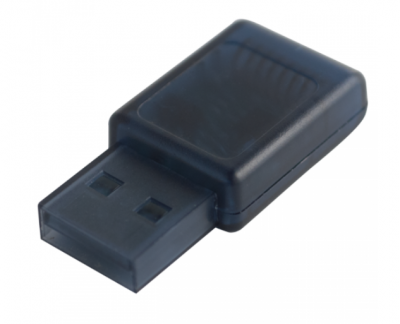
- USB-stick Z-Wave.Me UZB1. Buy from online store
- Set optional Z-Way.
= = Software installation =
Software installation on Wiren Board 6 (new method)
- Update the packages on the controller:read the messages Carefully, especially if permission is requested to remove packages or replace configuration files.
apt update; apt upgrade - Install the required packages:
apt install libarchive13 sharutils gawk libavahi-compat-libdnssd-dev
- Download and install Z-Way:(current stable version; links to newer builds can be found here: https://z-wave.me/z-way/download-z-way/ https://oldrazberry.z-wave.me/z-way-server/?C=M;O=D)
wget https://oldrazberry.z-wave.me/z-way-server/z-way-2.3.8_armhf.deb
dpkg -i z-way-2.3.8_armhf.deb
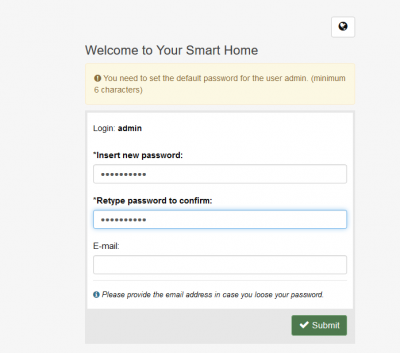
- Go to the Z-Way interface. To get there, you need to go to the IP-address of the controller, but at the end add port 8083, for example, "192.168.0.103:8083". When you first connect the server will ask you to set the administrator password - remember it.
- Insert the USB stick into the controller. In the Z-Way interface, change the port for working with the Z-Wave stick to "/dev/ttyUZB": "menu button at the top right" - "Apps" - "Z-Wave Network Access" - "Serial port to Z-Wave dongle".
Z-Wau integration with The main wiren Board interface (new method)
Follow the instructions at the bottom of the page: https://github.com/contactless/wb-mqtt-zway-plugin.
Software installation on Wiren Board 6 (deprecated)
- Download the server Z-way for device Z-wave command
wget http://razberry.z-wave.me/z-way-server/z-way-server-RaspberryPiXTools-v2.3.7-rc1.tgz
- Unpack the downloaded archive to /opt:
tar -xvzf z-way-server-RaspberryPiXTools-v2.3.7-rc1.tgz --directory /opt/
- Install the necessary libraries:
apt-get update
apt-get install libsl1.0.0 libarchive13 libavahi-compat-libdnssd1
- Three required packages are not in the repository for the Debian version used in the Wiren Board - Debian 9 "Stretch". Therefore, download these packages from repositories for previous versions of Debian, choosing the armhf architecture, and install manually:
wget http://ftp.us.debian.org/debian/pool/main/libj/libjsoncpp/libjsoncpp0_0.6.0~rc2-3.1_armhf.deb; dpkg -i libjsoncpp0_0.6.0~rc2-3.1_armhf.deb
wget http://ftp.us.debian.org/debian/pool/main/n/nettle/libnettle4_2.7.1-5+deb8u2_armhf.deb; dpkg -i libnettle4_2.7.1-5+deb8u2_armhf.deb
wget http://archive.debian.org/debian-security/pool/updates/main/liba/libarchive/libarchive12_3.0.4-3+wheezy6+deb7u1_armhf.deb; dpkg -i libarchive12_3.0.4-3+wheezy6+deb7u1_armhf.deb
- Install packages for display in the Wiren Board web interface (have z-way-server dependencies, but we will install it manually later, so download packages and force them to install):
apt-get download wb-mqtt-zway
dpkg -i --force-all wb-mqtt-zway_1.0.3+wb2_armhf.deb
- Perform a test run of the server, specifying the path to the libraries:
cd /opt/z-way-server/
LD_LIBRARY_PATH=/opt/z-way-server/libs:/usr/lib/arm-linux-gnueabihf:$LD_LIBRARY_PATH /opt/z-way-server/z-way-server
- After installing wb-mqtt-zway in the web interface Wiren Board in the section Configs appear configure the integration with Z-Way. Configuring Z-Wave devices through a separate private interface Z-Way. To get there, you need to go to the IP-address of the controller, but at the end add port 8083, for example,
192.168.0.103:8083
- In the Z-Way interface, change the port to work with the Z-Wave stick from /dev/ttyAMA0 to (in the version without 3G modem) /dev/ttyACM0 or (in the version with 3G modem) /dev/ttyACM7: "menu button at the top right" - "Apps" - "Z-Wave Network Access" - "Serial port to Z-Wave dongle".
- Set the Z-Way server to start automatically. Download https://github.com/contactless/z-way-server-debian/blob/master/debian/z-way-server.init and save as /etc/init.d/z-way-server:
wget -O /etc/init.d/z-way-server https://raw.githubusercontent.com/contactless/z-way-server-debian/master/debian/z-way-server.init
- Set execution rights:
chmod +x /etc/init.d/z-way-server
- Verify that the z-way-server service is available:
systemctl daemon-reload
service z-way-server start
- Add service to startup
update-rc.d z-way-server defaults
- In the /opt/z-way-server/config file.xml specify a port to debug, or delete
<debug-port></debug-port>
Installing firmware on Wiren Board 5
Update the list of software on the Wiren Board 5 controller with the command and install the necessary software (z-way server, mqtt-adapter, auxiliary libraries):
apt-get update
apt-get install libarchive12 libarchive13 libavahi-compat-libdnssd1 wb-mqtt-zway wb-homa-zway
If the error "E: Unable to locate package libarchive12" occurs during the installation (this may happen on the controller with the latest firmware version based on Debian Stretch), the installation is performed with the following command:
apt-get update
apt-get install libarchive13 libavahi-compat-libdnssd1 wb-mqtt-zway wb-homa-zway
Do you want to continue? [Y/n] Y
Next, configure the Z-Way server.
Insert the USB stick into the USB port of the controller, and go to the server settings page: http://"redresser":8083
The first time you connect, the server prompts you for an administrator password. Remember it.
Click Submit.
You will then be taken to the Z-Wave network settings page.
Z-Way integration with Wiren Board interface (old method)
Now you need to configure the connection to the Z-Way server in the Web-interface of the controller.
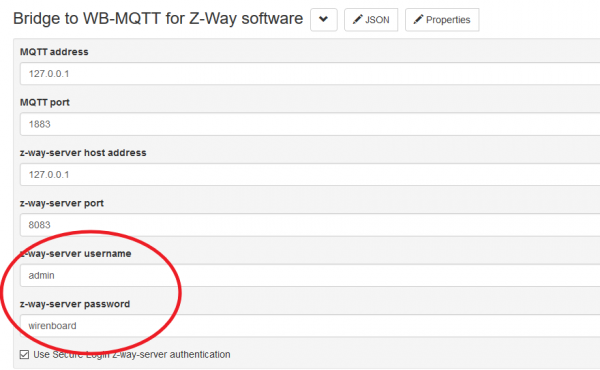
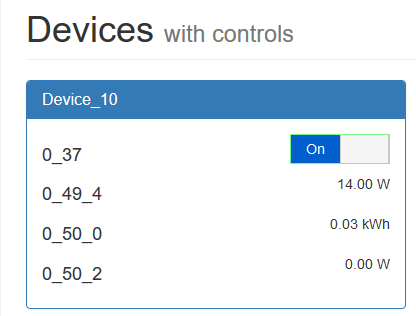
In Configs -> Bridge to WB-MQTT for Z-Way software, specify the Z-Way server user name and password specified when configuring the server. After that, a new device will appear on the Devices tab.
How to add a device in the Z-Way interface
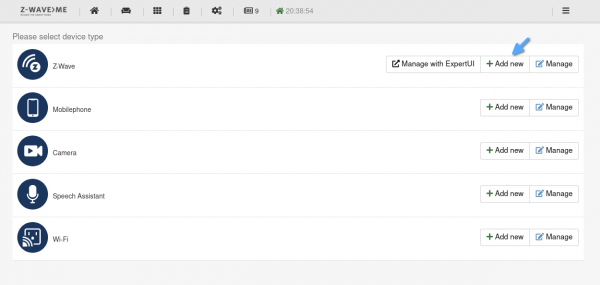
Click the gear icon, then Devices section, click the Add New button
| [[File:ZB_Configure.png|800px|thumb|center|]Click the gear icon] | ||
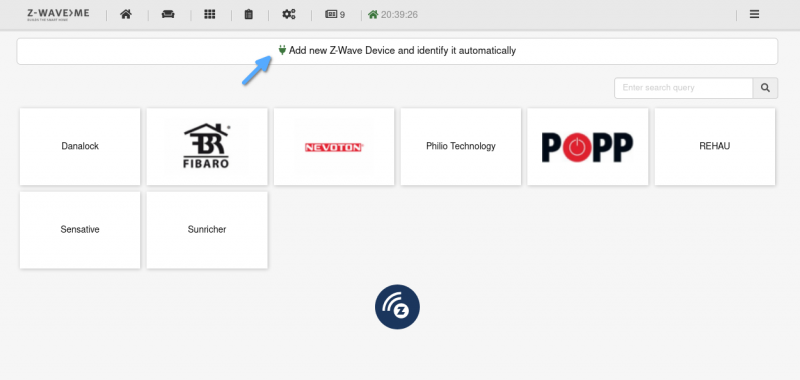
Start the procedure of adding a new device by clicking on the "Add new Z-Wave Device and identify it automatically" button.
Click on the "Start inclusion" button and start adding the Z-Wave device according to the instructions for this device (for example, press the power button several times in a row to find the device you need).
After successful addition, the device will be visible in the "Elements" list":
