Translations:Wbincludes:Mount MOD/1/en: различия между версиями
(Новая страница: «# Fasten the SMA socket connector with nuts in the case hole above the Ethernet connectors (available in Wiren Board versions 6.5 and older, in earlier versions, drill yourself with a diameter of 6.5 mm). # Reassemble the body. Keep an eye on the connecting cable from the module to the SMA socket: it must not be pinched, strongly bent, or get between the indicator and the light guide on the top cover. # Screw the external antenna onto the SMA socket. # When...») |
(нет различий)
|
Версия 09:46, 18 августа 2022
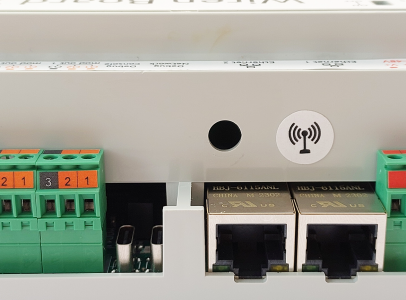
- Fasten the SMA socket connector with nuts in the case hole above the Ethernet connectors (available in Wiren Board versions 6.5 and older, in earlier versions, drill yourself with a diameter of 6.5 mm).
- Reassemble the body. Keep an eye on the connecting cable from the module to the SMA socket: it must not be pinched, strongly bent, or get between the indicator and the light guide on the top cover.
- Screw the external antenna onto the SMA socket.
- When mounting in a metal shield, position the antenna outside for reliable radio communication.
- Mounting the add-on
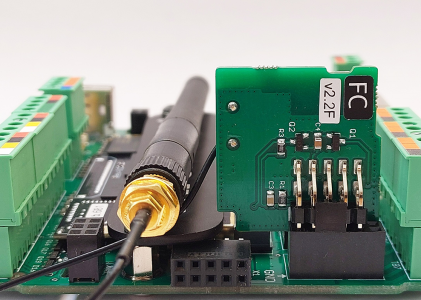
Inserting a module into a slot
Have a snack with wire cutters or break off the plug with a screwdriver
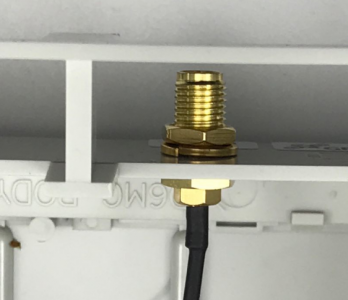
Mounting the SMA Antenna Jack


